Thin-section making recipe 2021 version.    by Yoshio Okamoto 2nd February 2021

日本語の解説ページはこちらです. 

Making home-made rock grinder is here.

Making home-made rock saw!


§.Preface

The professional rock saws are high expensive around 1000 to 5000 USD.
Also their diamond blades are too.
So, we tried to make our home-made rock saw at a cheap cost.
We used a common bench-grinder sold at DIY stores.
It costs less than 100USD!
Also, we found cheap diamond blades at the Chinese online shops.
The idea of our own made rock saw is inspired in an attempt by amateur rock collector M. Miyazaki.
https://sites.google.com/site/zatsukichou/home/jiao-shan-shi (Japanese page)

Caution: using water causes sometimes electric shocks, so please use a ground terminal or line. 


§. Materials (2021 version, Using 3D printer)

You can use an equivalent tool as follows,

A bench-grinder purchased at a DIY shop.  70USD


https://item.rakuten.co.jp/yamakishi/34952153/ with Japanese catalog.
●Purpose: grinding, polishing and deburring metal
●AC100V(50/60Hz)
●3.3A/3.0A(50/60Hz)
●330W/270W(50/60Hz)
●2850RPM・3450RPM(50/60Hz):
●Wet stone:150×19mm with a 12.7mm hole
●Grit:A36・A60


Diamond blade:
6 to 7" 150-160 mm thickness 0.6-1.2mm Diamond Lapidary Saw Blade, Arbor 3/4" or 1/2" at AlliExpress. around 20USD
For example: https://ja.aliexpress.com/item/32829736054.html


Acrylic plates (5mm thickness, Some shops sell as mils ends)http://www.acry-ya.com/acry-ya_new/html/diy/htm/hazai.htm
Acrylic cutter and glue


§Making and usage

The following modifications include work that deviates from the original intended use of the manufacturing company. Of course, there is no guarantee from the company, and we do not take any responsibility for the following( work.
The large pictures can be seen to click links of the images.

Making our rock saw! (2021 version, Using 3D printer)

Old-version is here.

We use the following 3D printer Ender 3 Pro (right) 250 USD.


After one year using this tool, we found a drawback of our machine,
so please see the following pages,

http://seagull.stars.ne.jp/2020_Thin_Section/Fix_Rock_Saw/index_e.html
img_1976.jpg img_1981.jpg
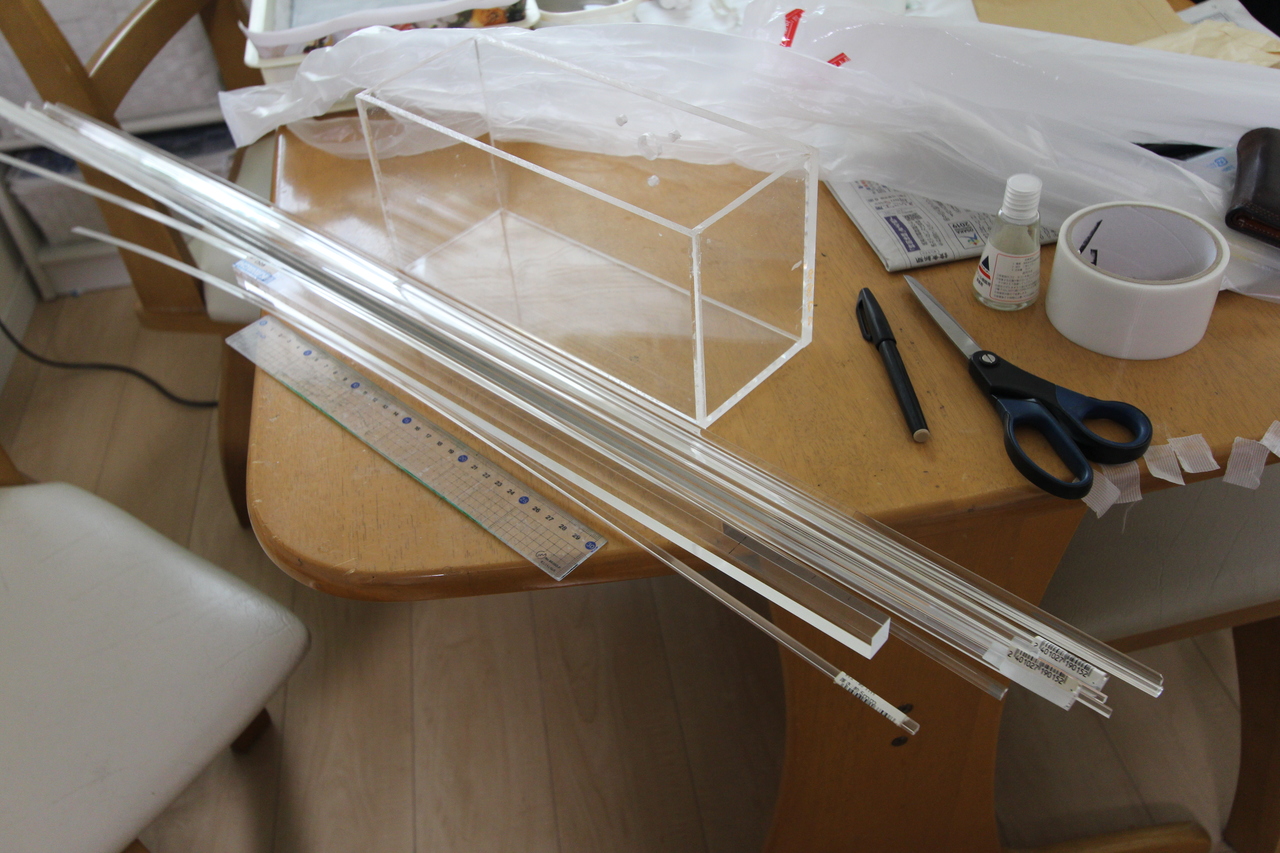
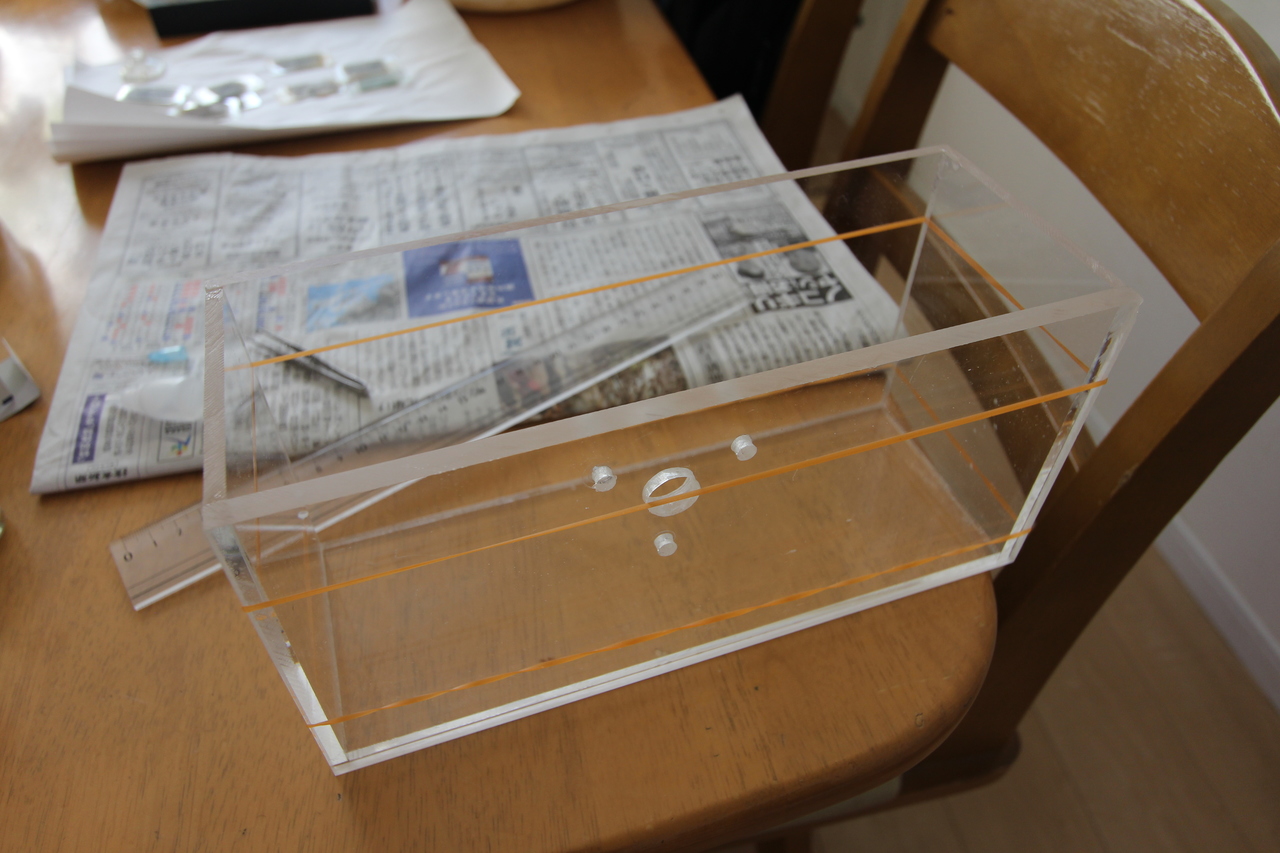
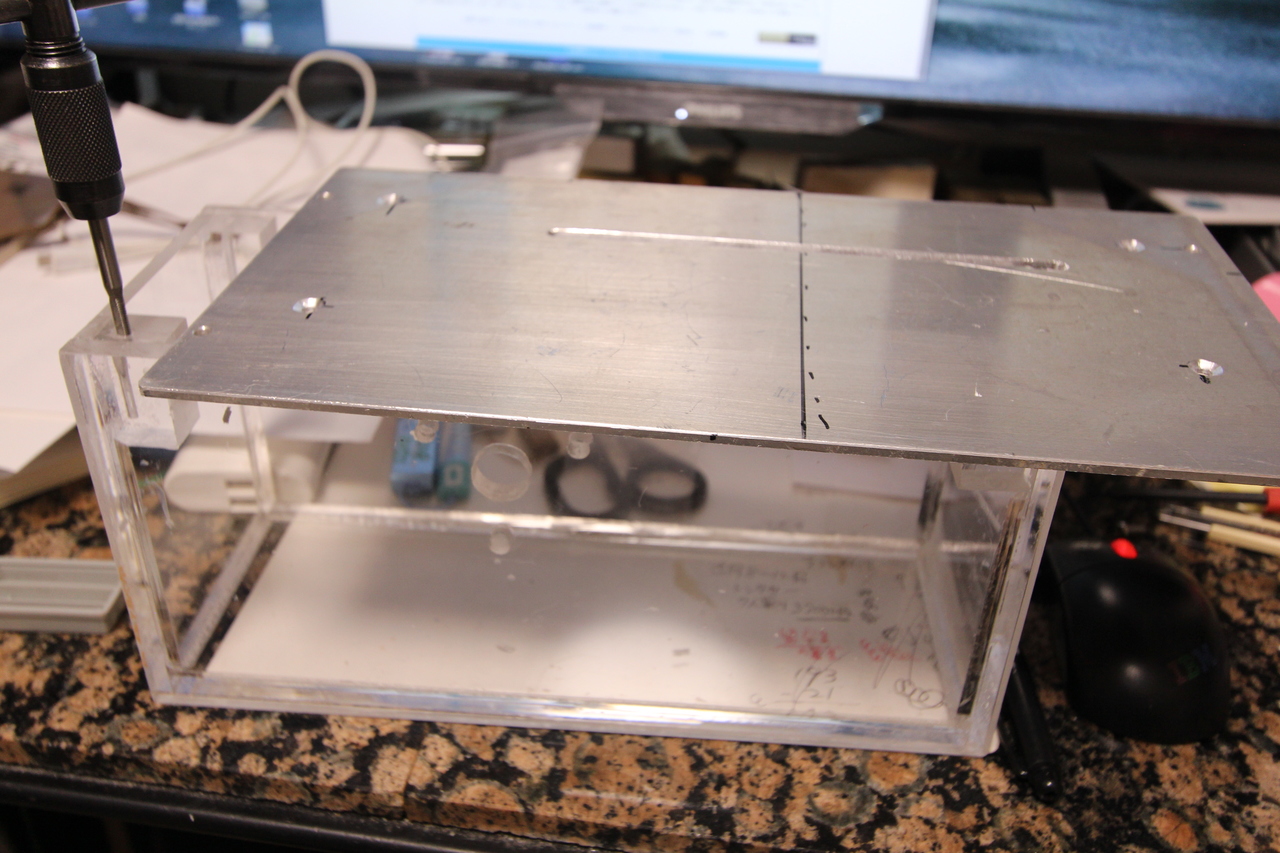
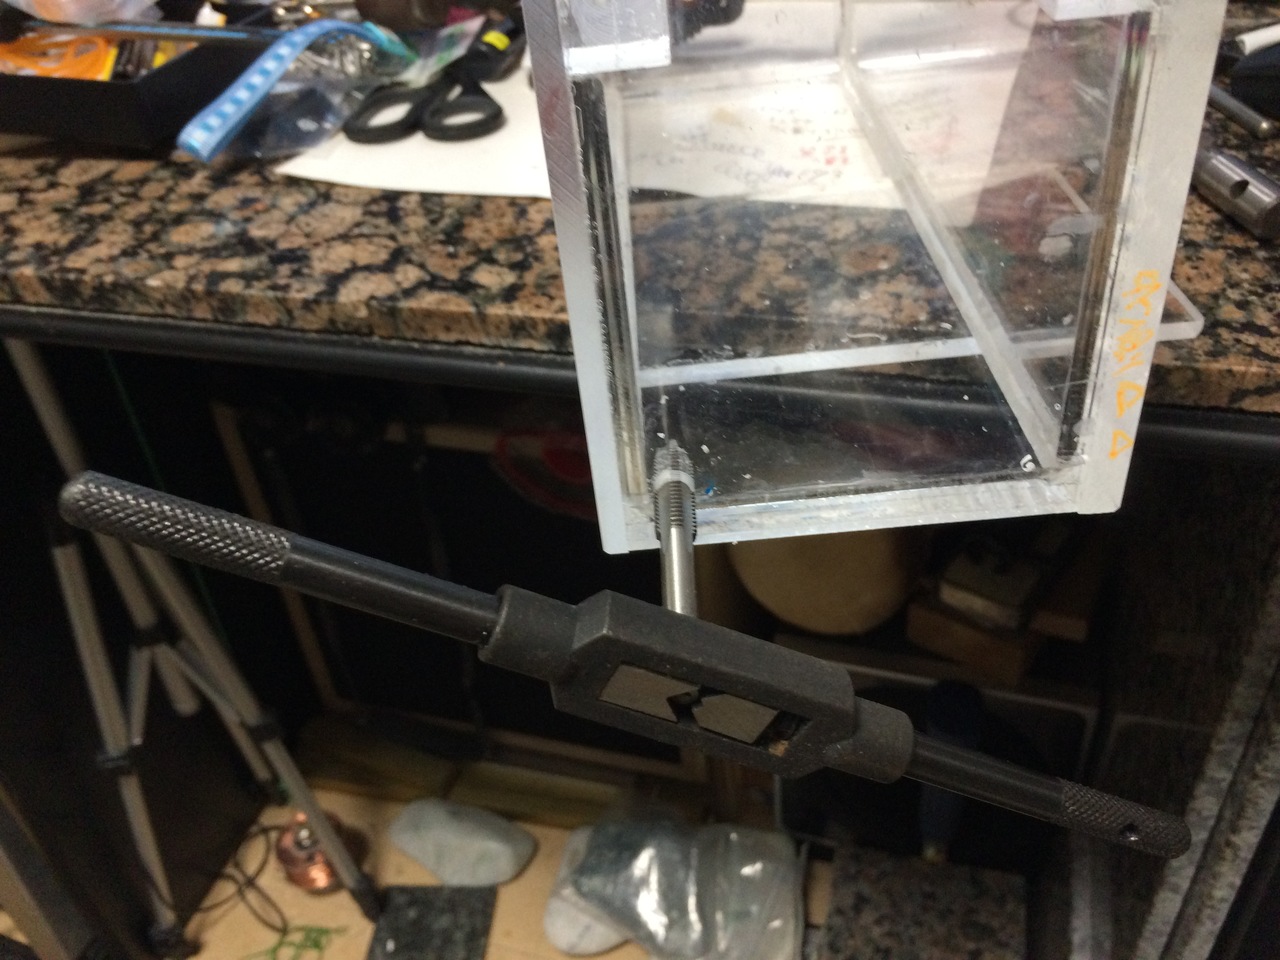
Making a water tank from acrylic plates Cutting by a acrylic cutter and gluing by acrylic glue. We recommend to use hand gloves for avoiding incision.
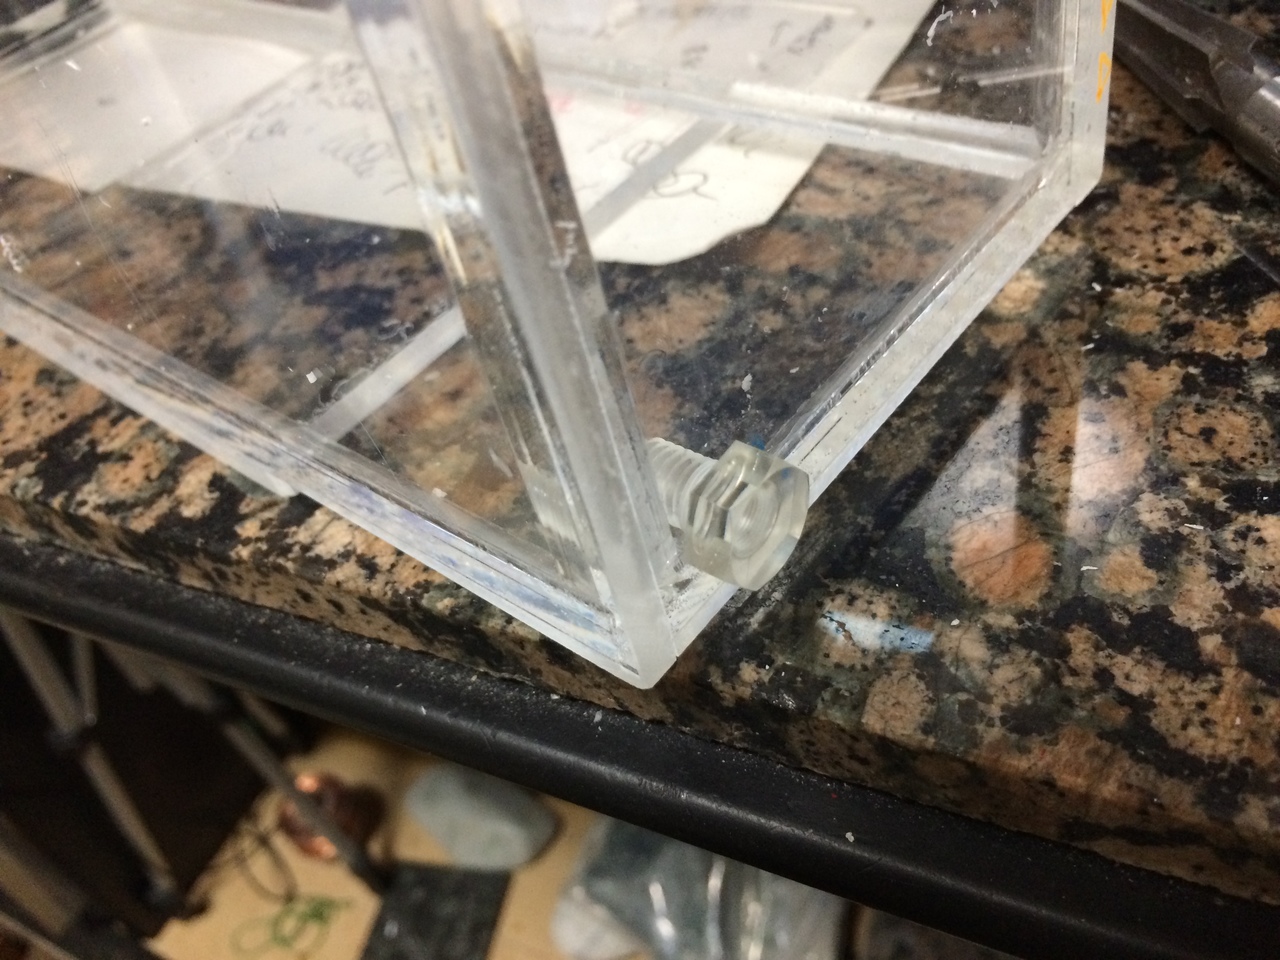
The triangle pillars are used for water proof of the tank.
img_3049.jpg img_3053.jpg
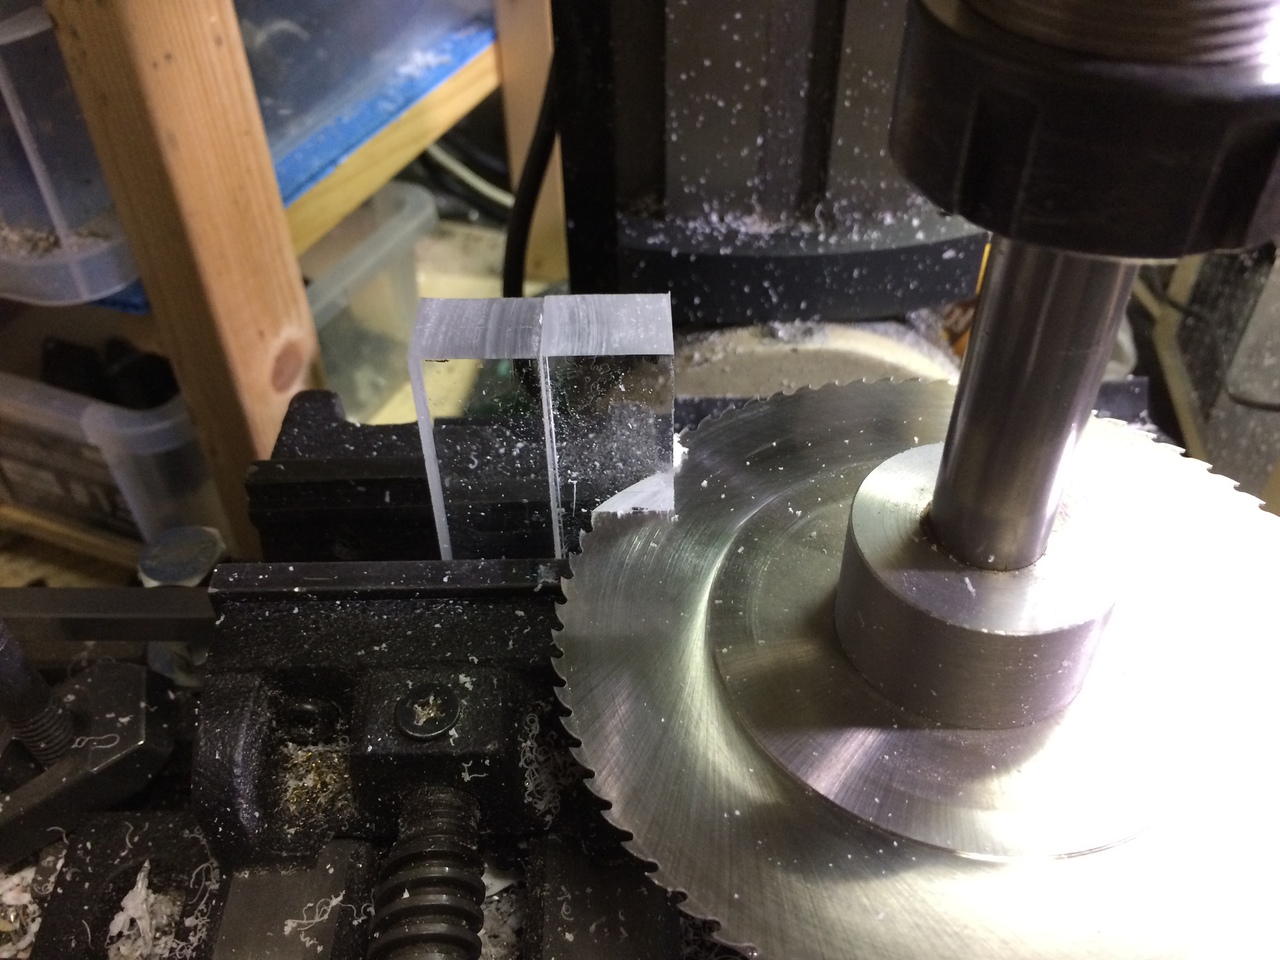
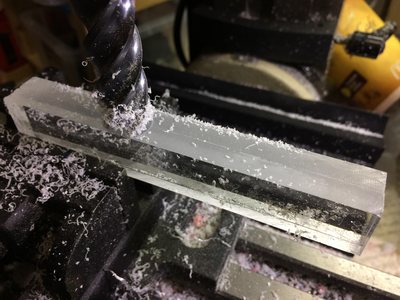
For a thick pillar of the corners, we used a table-top milling machine.
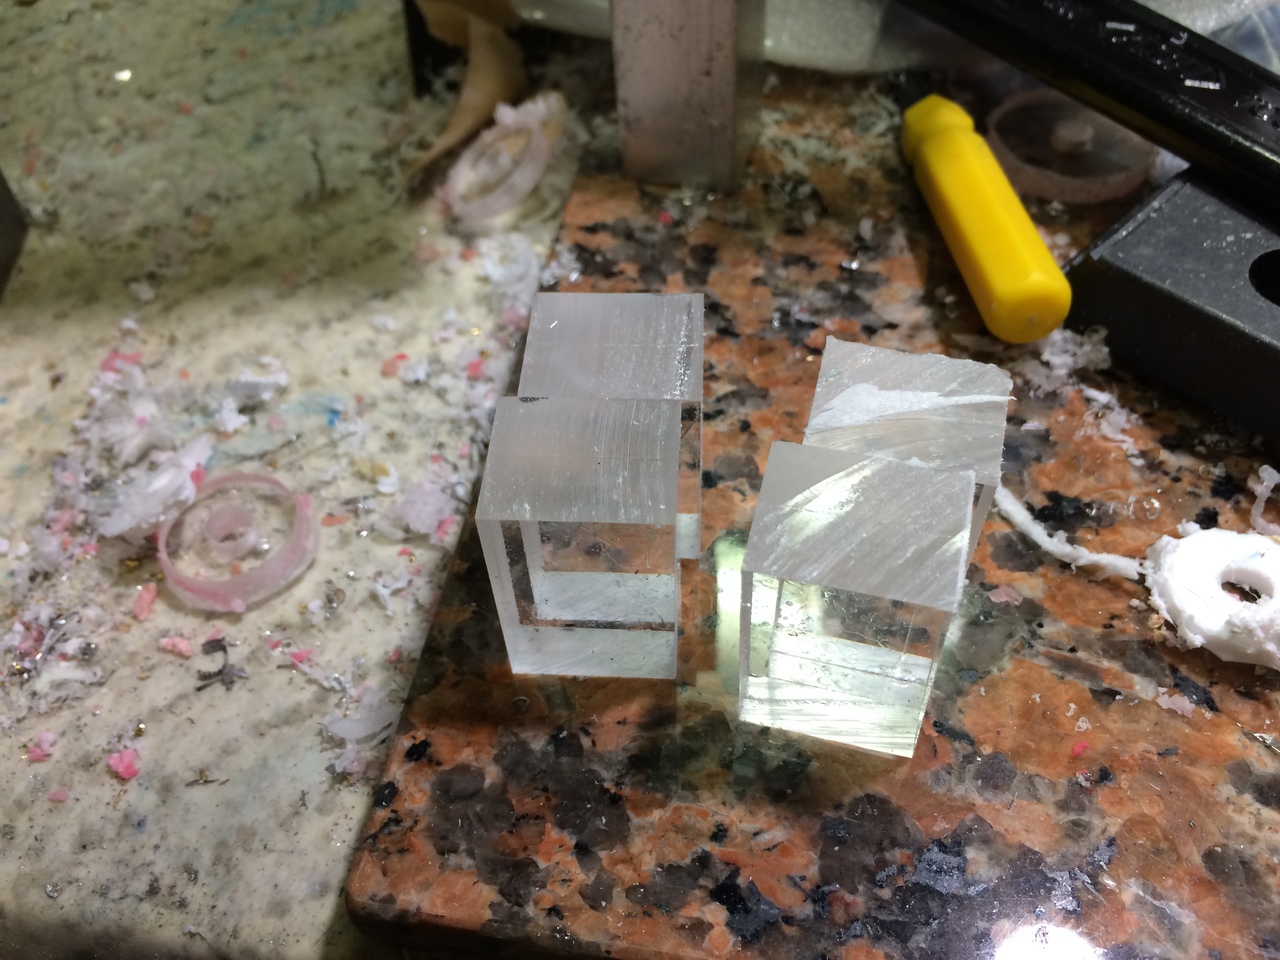
Next, cutting to four corner pillars.
img_3055.jpg img_2188.jpg
These are corner pillars to fix a 3mm aluminum top stage.
The table and the pillars. A 4mm tap is now making screw holes.
IMG_1232.jpg img_3113.jpg
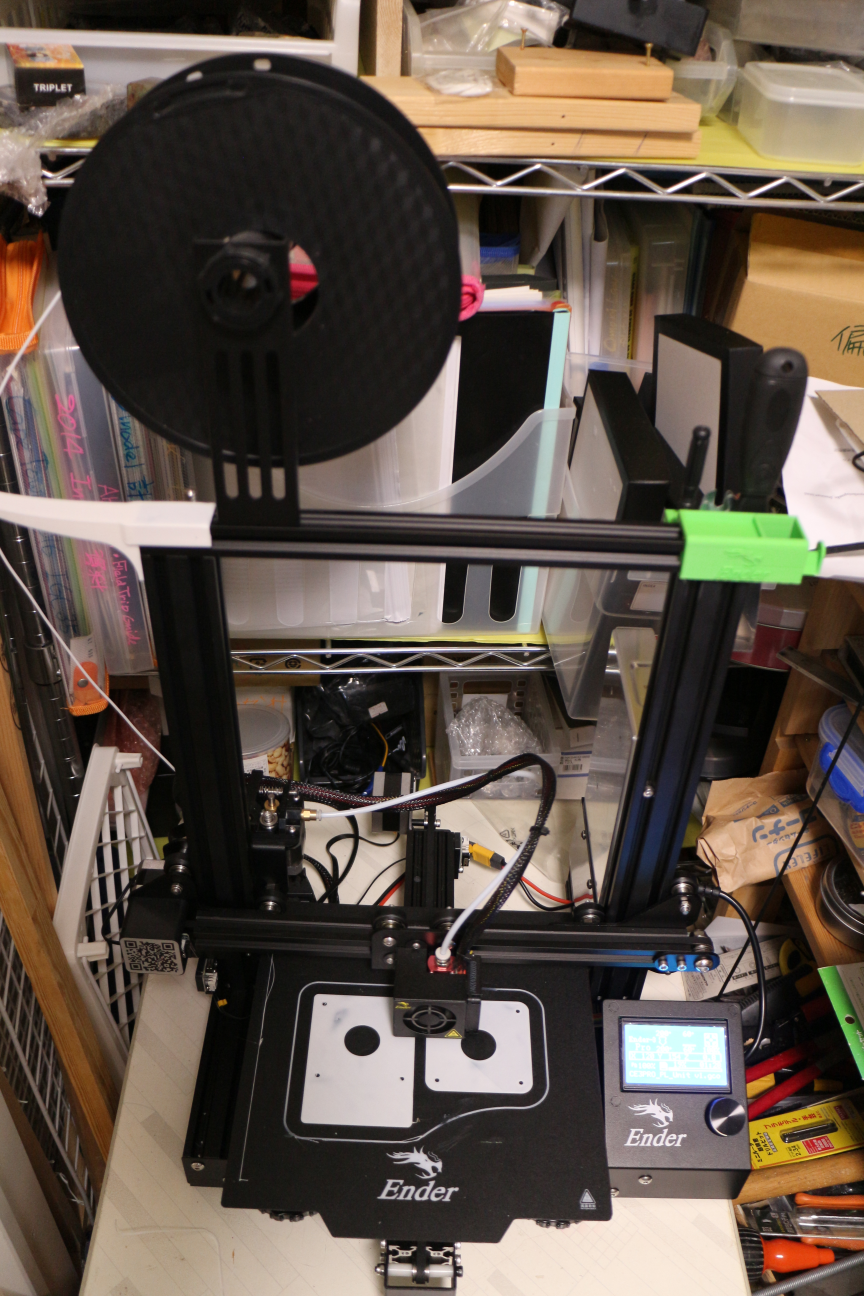
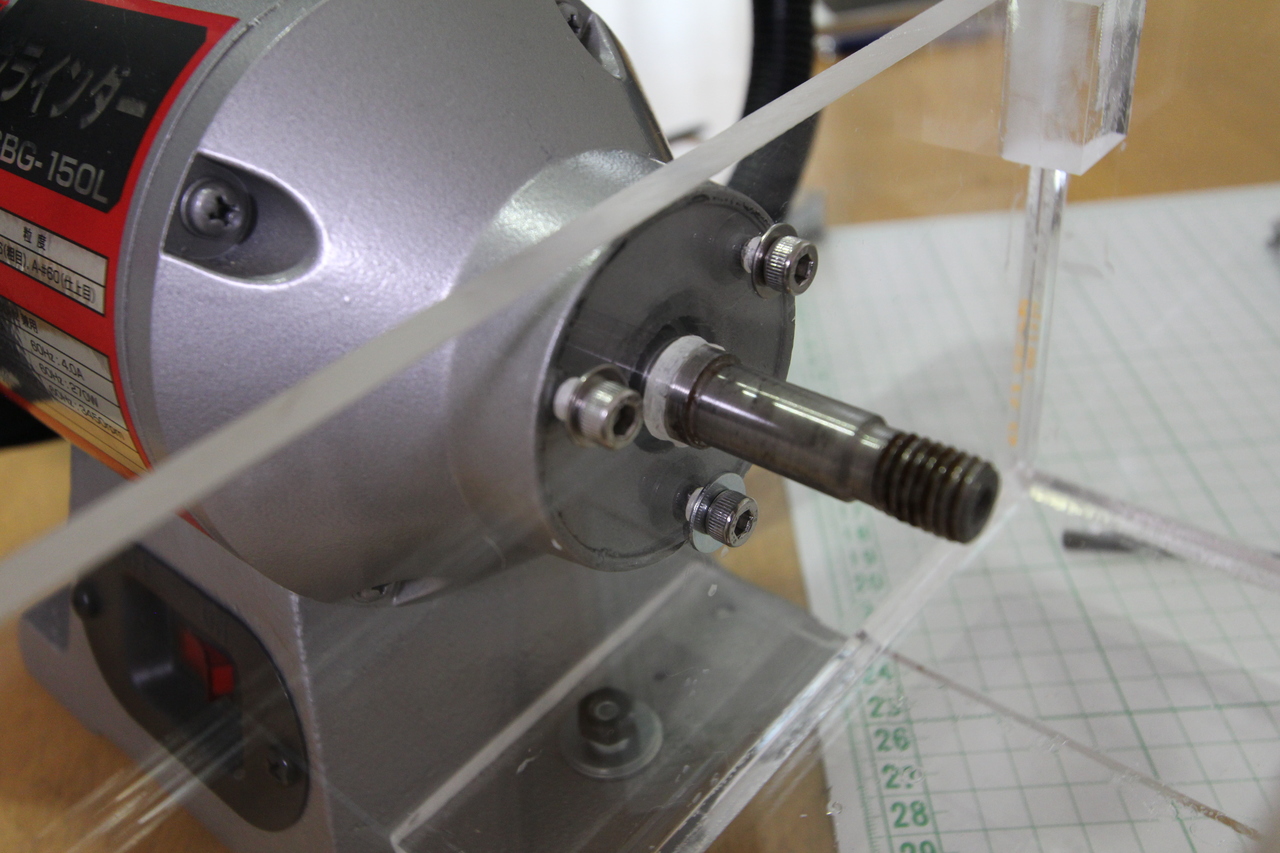
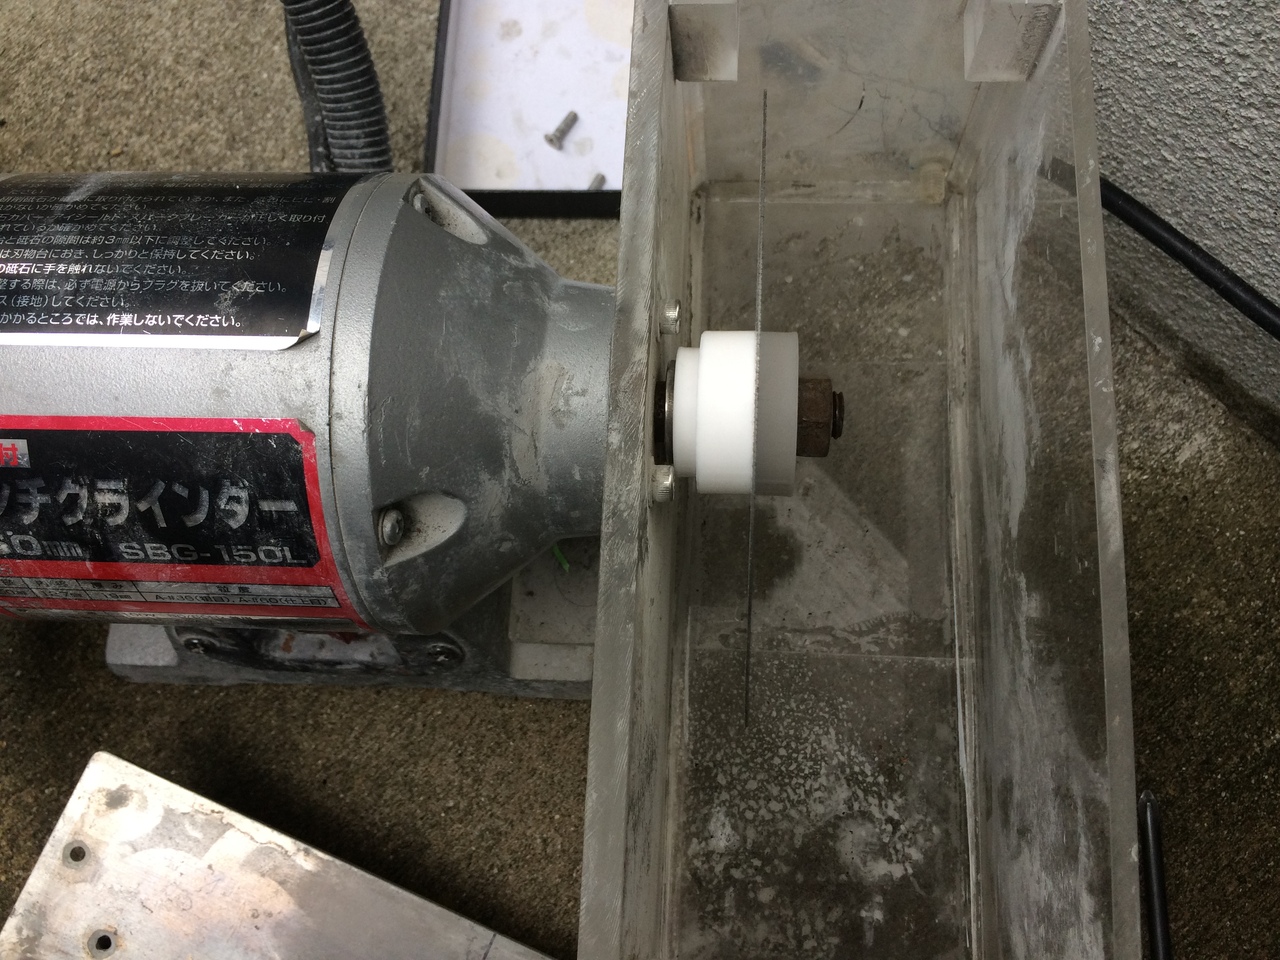
Using 3D printer, we made a coupled arbor. The behind aluminum ones are the older version which are made by using a table lathe. (new photo)
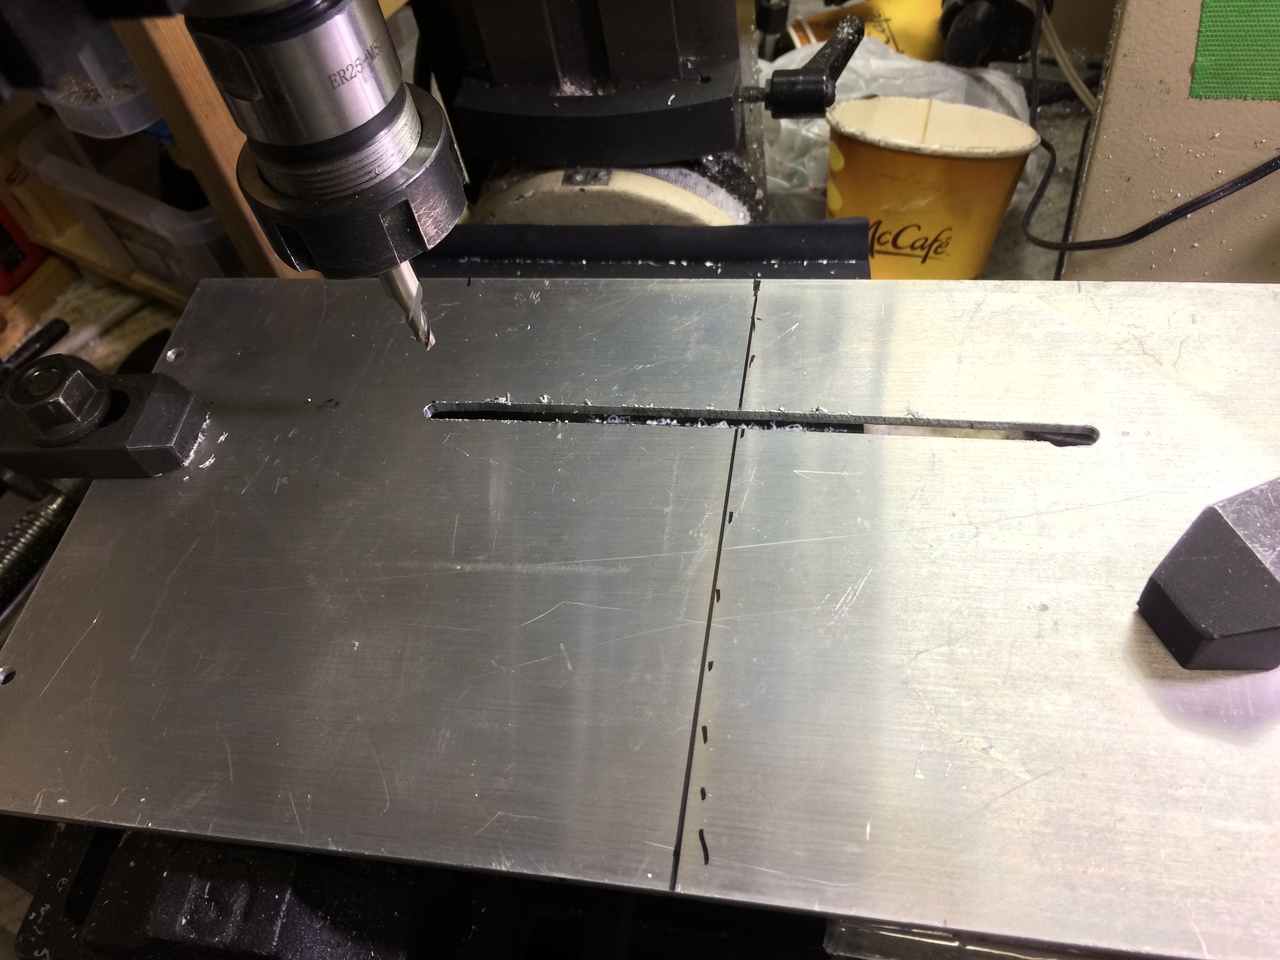
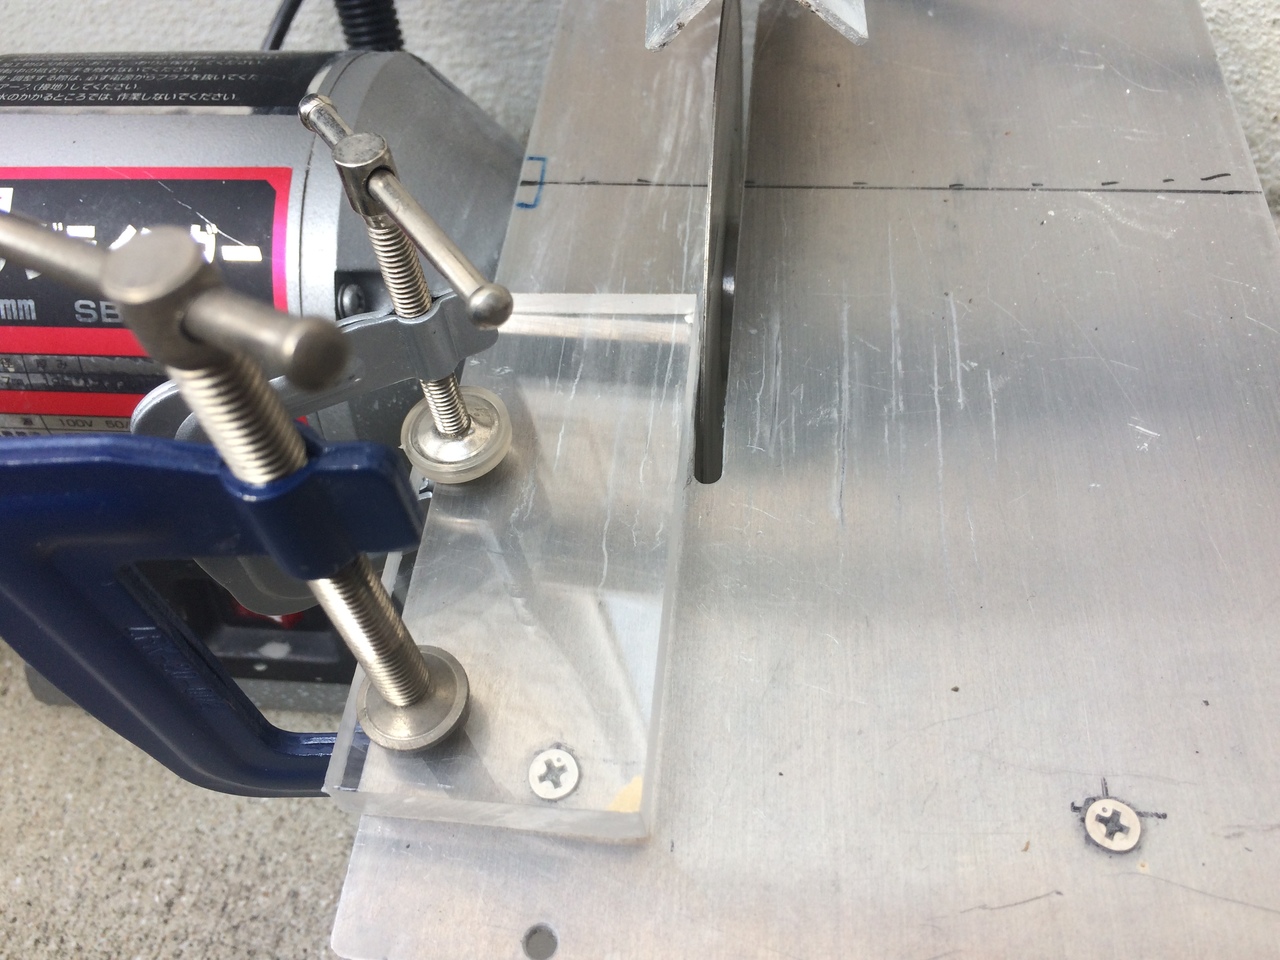
Next, we mill a slit for the diamond blade on the aluminum table (3mm thickness). A 5mm end-mill is used. However, it is not easy to make a straight slit due to machine habit (rotation).
img_3117.jpg img_3163.jpg
The straight slit is completed.
All parts are prepared. The water cover is made an aluminum L-shaped bar.
img_2199.jpg IMG_1238.jpg
Water tank is fixed by 3 holes to the motor cover and one bolt to the base.
An arbor is mounted on the motor shat. (new photo)
img_2203.jpg IMG_1248.jpg
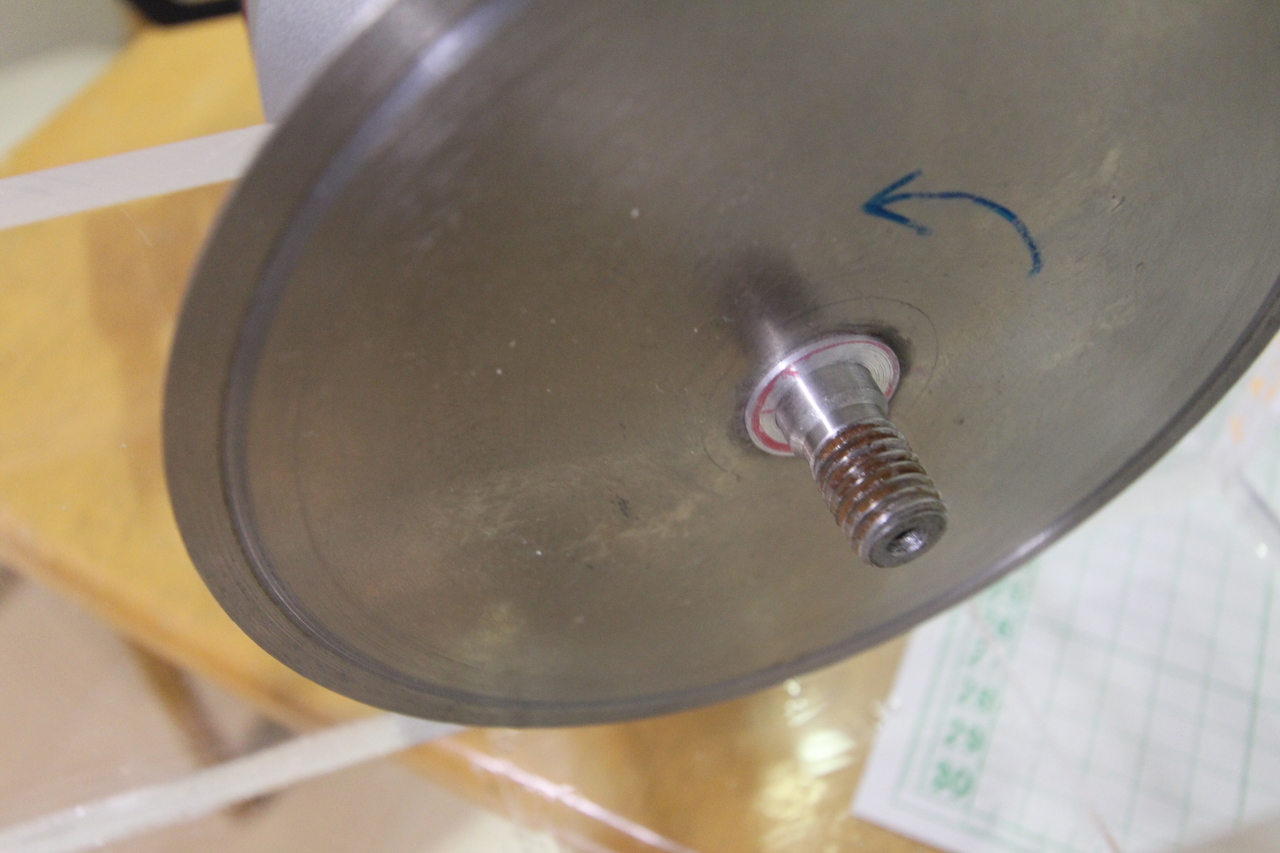
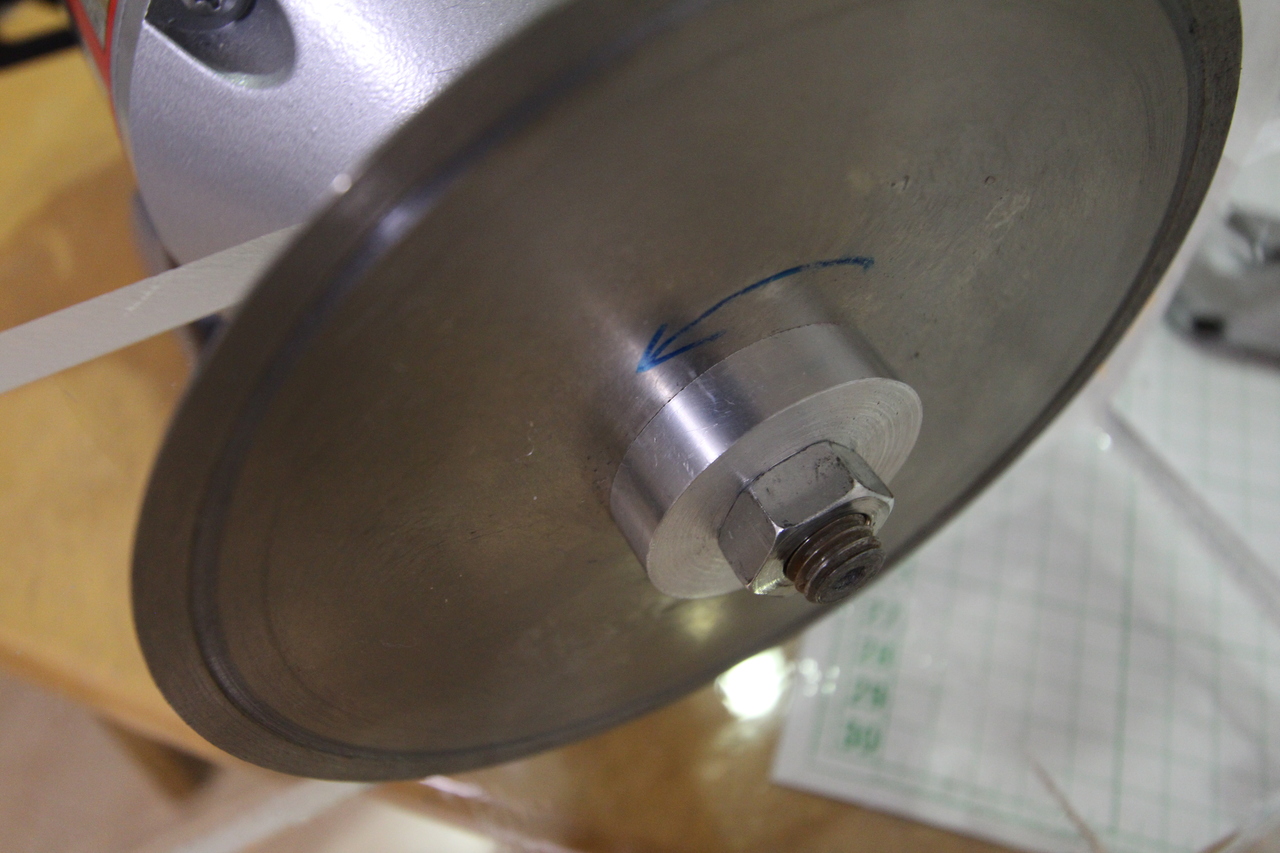
The diamond blade is mounted as the right rotating direction. The detail is in the following link. http://www.dca.or.jp/di_tools1.html
The diamond particles are buried on the iron plate with tails like falling stars.
We finished mounting the arbors. (new photo)
img_6286.jpg my_photo-126.jpg
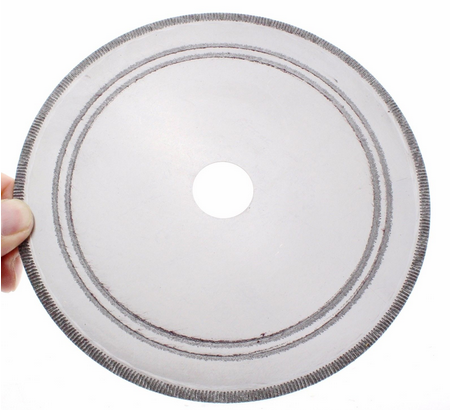
Two types of the diamond blade, we can purchase from AliExpress. Their costs are around 10USD. The cutting quality is almost same by my feeling.
Close up of the blade by a USB microscope. You can see yellow small diamonds with the tails. The left hand side is the rotating direction.
img_2209.jpg img_2214.jpg
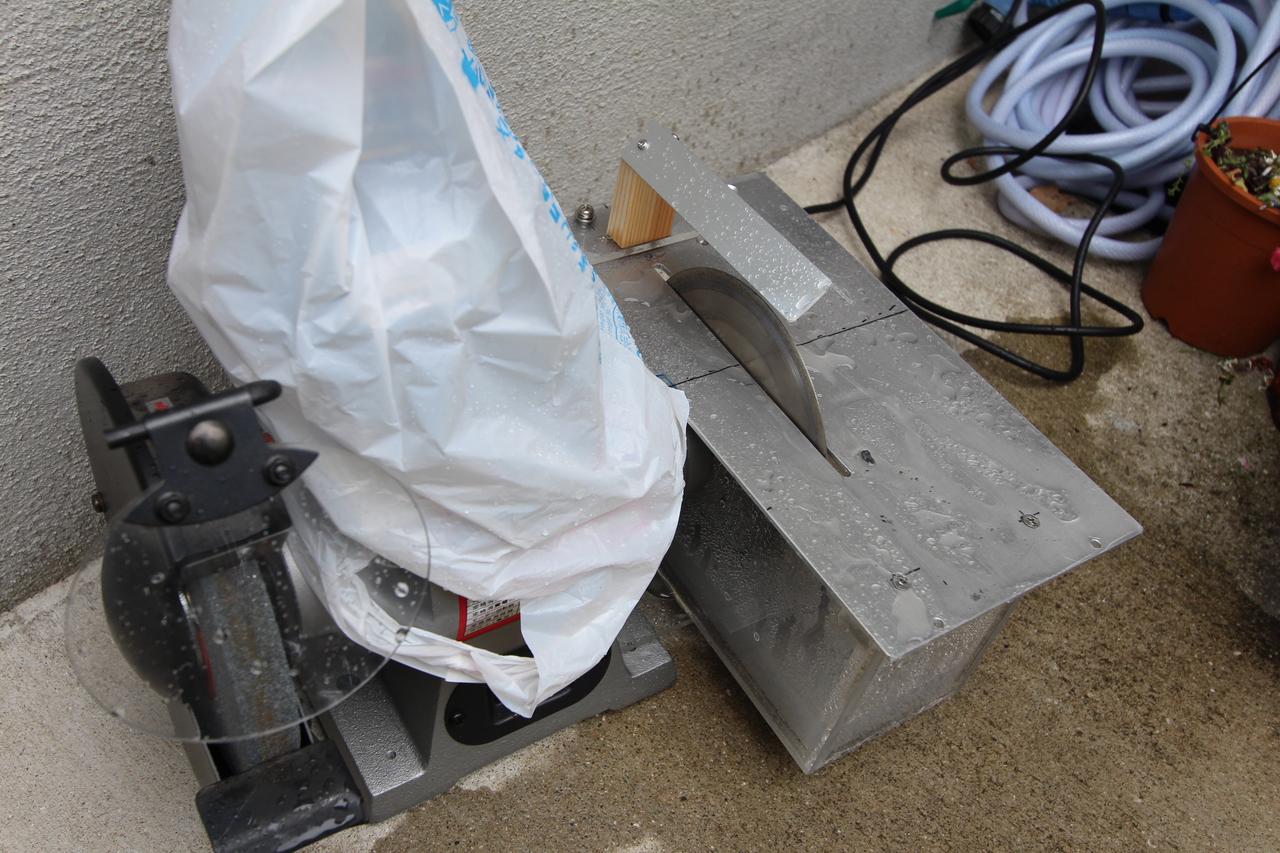
The blade is fixed while the another side wet stone handling to stop. (old photo)
Covered by the table and run water into the tank. We tested our new rock saw successfully, although it began to rain.
img_3197.jpg img_3201.jpg
After the first test, we check the motor shaft. We found brown rust. And may a little water invades inside.
This caused a big problem one year after!, see  
http://seagull.stars.ne.jp/2020_Thin_Section/Fix_Rock_Saw/index_e.html
A drain cock hole screw is made with a 8mm tap.
img_3204.jpg img_5094.jpg
M8 plastic bolt is used as a drain cock. There is no water bleeding now.
The cutting guide for the tip glued on the slide glass. A thick acrylic plate a and two crumps are used.  

img_5099.jpg
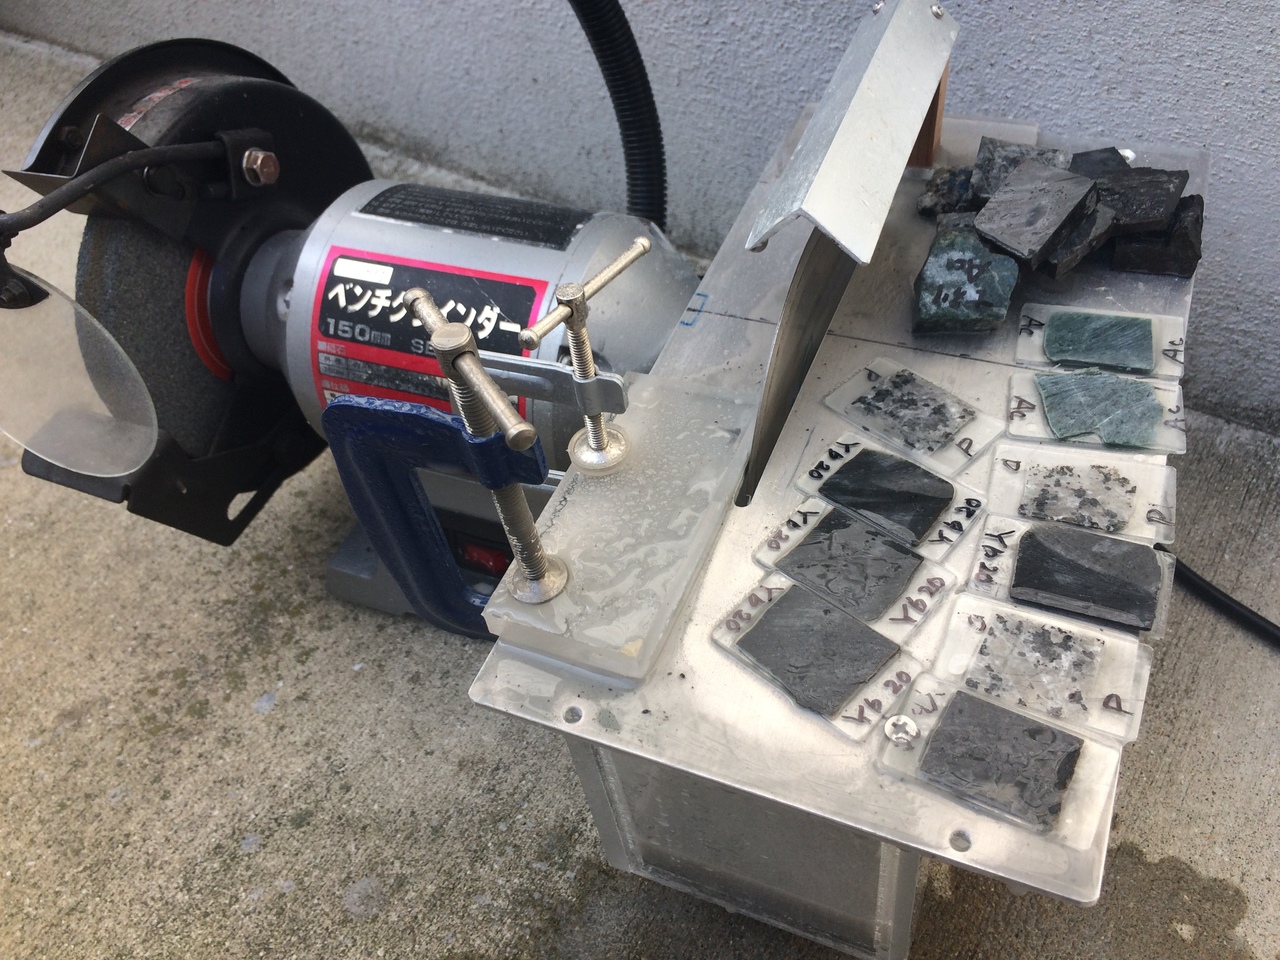
Slide glass  tip is cutting. Click the image to see a movie!
The cut tips. Next is second grinding.

After one year using this tool, we found a drawback of our machine,
so please see the following pages,

http://seagull.stars.ne.jp/2020_Thin_Section/Fix_Rock_Saw/index_e.html


Copyright © 2019−2021 Yoshio Okamoto All Rights Reserved.